Pages

Friday, 5 April 2013

Using drinks cans to craft metal embellishments

This is a photo heavy tutorial!

I've used cans to supply craft metal for some time (and Hubby so enjoys helping with the supplies lol!!).  I taught my craft class this technique in a recent die - cutting class. A few people on the blog recently asked for a step by step tutorial, so here 'tis!

I'm sure you can find a video on you tube, and there are bound to be better (and safer!) ways to do this, but this is what works for me....

You will need.....scissors and an empty, clean drinks can (food cans are too thick and don't work) - soft drinks are just as effective, but this is what''s readily available in the Willis house!
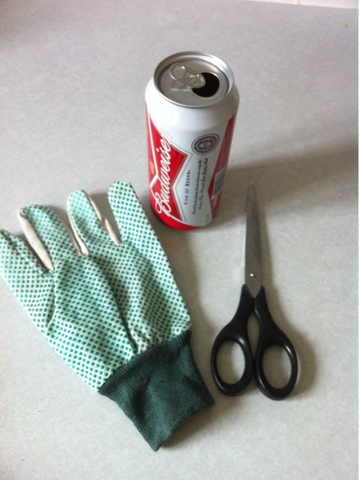
the gardening glove is my nod to health and Safety, as cutting the can exposes some nasty sharp edges.  Please don't use your best crafty scissors, I use an old cheapo pair that aren't used for anything special - if you have one of those super duper knives that cut anything ( as sold on various tv shopping channels!) that would probably work too!

The first thing you do is use one blade of the scissors and poke the point through the tin near the top........
....then make the same sort of incision near the base.  I find it easier to puncture top and bottom whilst the can is still intact. Once you cut off one end it is much harder to puncture the other end. Then you cut off one end starting at the incision you just made - I do this still using one blade of the scissors in a sawing motion, you might find it easier to cut with them using them as actual scissors!

Once you've removed both top and bottom, you will be left with a tin tube and two ends......
 
  The next step is to change it from a tube to a flat piece of metal.  So use your scissors to cut a straight line up the length of the can - I find it easiest to follow the line where all the text ends, it's usually a good guide, but will obviously depend on the manufacturer.

....this will leave you with a tight tube, but probably lots of nasty sticky out ends of metal!  These are very dangerous, and part of the reason for the garden glove - you will really know it if you catch your hand on one of these little shards! If you're anything like me the first time I did this, the air will turn blue :-) so USE A GLOVE!! Ahem, sorry about the lecture, soap box has been returned to its resting place lol!

So you need to trim the 2 ends to give even edges with no shards. I sometimes get a large shard where I've been a bit vigorous with my cutting! So the size of this shard determines how much I need to cut off to get an even edge....

You should now have a nice even length of metal (still tightly rolled!) with no shards or uneven edges.  You can throw all the offcuts away, and this is how I straighten out the tube.....

.....I pull the tube over the edge of my kitchen worktop several times to flatten it! You won't get it completely flat, but enough to work with, and once you start cutting and embossing, it will flatten out even more.

Now for the fun bit! You can die cut (I tend to tape the die to the metal)....


You can run it through an embossing folder............


and don't waste the 'waste'! These make great frames for scrapbook pages or cards....


Once you're done, you can colour with alcohol inks, and I find the best adhesive is Pinflair glue gel (or any silicone gel) as the metal may not be totally flat, a flexible adhesive works best.

Hope this helps you upcycle those cans, and I would love to see anything you make with them!!

Happy crafting

Debs x


More Christmas snippets!

This card is a variation on a snippets make from last week, I just cut lots of small squares, and laid them on the A6 card like a diamond patchwork,and added faux stitching. Then used the last few layers of the stacker topper I used on the card in my previous post - I hardly ever use all the layers of any decoupage/stackers on one card - always conscious of Mr Posties need for lower rate postage to fit a card thru the annoying skinny slot!!!

I really struggle to use A6 cards - I prefer larger Cards, and I am particularly into square cards at the moment. I find it easier to work with a larger space to decorate - what about you? Do you prefer big or small cards? This one doesn;t look quite right to me, but I'm not sure what's missing - all suggestions on a postcard please ....lol!!

I am entering this into Pixies Snippets Playground, cos everything on here is snippets, even the greeting was found lurking in my newly unearthed box of Christmas stuff! Also into Crafty Hazelnuts Christmas Challenge, cos the sentiment is one of my all time fave Christmas songs!

Happy crafting

Debs x


More snow!

Yesterday was absolutely freezing here on the South Coast, and we had light snow for most of the afternoon, thank goodness it didn't settle.

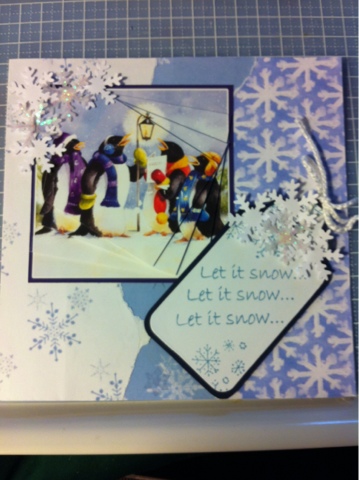
So it seemed appropriate to be making Christmas cards! This one is for Crafty Hazelnuts Christmas Challenge - 'Christmas song' - I thought this song might be appropriate for the penguins to sing!


I was having a bit of a tidy in the craft room & found 2 x A4 boxes of unidentified 'stuff'. When I opened them up I found lots of part finished Christmas projects & paper off cuts, old cards kept for upcycling, heat embossed Christmas greetings and on and on! Looks like I have enough to make several years worth of cards, and that's not counting any of my 'proper' Christmas stash!


So as this card is made from snippets, I will also enter it in Pixies Snippets Playground

Hope the weather is a bit kinder where you are!

PS - for those who asked about the tin cans, I will upload a tutorial later today or tomorrow

Debs x


Wednesday, 3 April 2013

WOYWW and daisies

Wednesday again and time to travel the craft world courtesy of Julia's stamping ground. I actually tidied my desk this week - though you wouldn't know from these photos! I had a box of bits and pieces that had been full to overflowing for weeks, and I finally sorted it all out - a very infrequent occurrence lol! Only problem is, in the process of sorting and dumping stuff, I managed to lose the cap to my [hubby's] scalpel - think it made it into the bin with a sweep of stuff off the desktop :-( See, there's a good reason why I don't tidy often!

My desk is back to normal messiness - was trying out my pebeo paints for Sheena's paint fusion technique (inspired by Hettie's work here) - had them for a while and thought I would try a few daisies and some lavender. only problem was, I couldn't find the stamps (hope they didn't go with the scalpel cap lol!!), so it ended up being just paint sans fusion!


First attempt was too much blue under the white, so tried again, looked a little better. Still need to practice!


A few people have asked about a previous WOYWW post, and how I use tin cans, and how to cut them up, so I will try to post a tutorial later in the week, with some samples. In the meantime, Shaz in Oz has been playing with tin cans & alcohol inks and produced some wonderful results!

Will be back later to check out other crafty desks, so thanks for stopping by.

Debs xx


Thursday, 28 March 2013

Hearts and flowers - vintage look wall hanging

This is the finished wall hanging made with hearts, some of you saw the experimental phase on my desk yesterday!

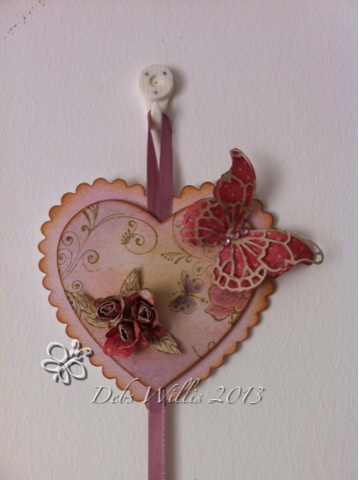
I couldn't achieve the effect I wanted with the acrylic paints, so went back to my trusty Distress Inks! really pleased with the finished effect, made with a Memory Box Butterfly die cut, some punched shapes & rolled rosebuds from K& Co McKenna papers, stamped with a mix of stamps from WOW, Creative Expressions and Dimension Stamps....

this is the full monty, hanging on my wall, and below are close up pics .....


Planning to teach this at a future workshop, should be great fun!

Thanks for stopping by

Debs x


Wednesday, 27 March 2013

WOYWW

Wednesday again, and time to travel the craft desks of the world via Julia's blog!
 My desk, as usual is a bit of a tip lol!! 


Centre front on my scratch pad are some hearts I've been experimenting with - still can;t quite get the result I want - I'm stamping with distress Inks over an acrylic painted background, which has been heat set to ensure that it is dry, but the Distress Inks keep smudging :-(  update - if you're interested in seeing the finished heart wall hanging, click here :-)

there's a scattering of stamps, my precious Ink Dusters - always in use! And you can see towards top right my box of Cosmic Shimmer Watercolours, which have also been used on the hearts.

Short and sweet today, as requested by desk-mistress Julia, so I'm off to do a bit of tidying, and crafting, and will visit desks later today

happy crafting 

debs xx

Tuesday, 26 March 2013

Easter gift (choc!!) box

Hi everyone, and a warm welcome to my new followers - I am always thrilled that people are interested in my projects :-)

This was inspired by a kit I saw at the NEC last week (unfortunately can't remember the name of the company selling the kits, sorry!)

I played with a box template I already had & tweaked it a bit, punched the top edge with a Martha Stewart border punch, decorated with First Edition 'Sweet Owl' paper and a stamped Helz Cuppleditch image coloured with Pro Markers, then cut out & fixed in place.

This isn't what I planned to work on today but, following a visit to the osteopath this morning I needed something quick & easy I could do on my lap tray with an ice pack in place :-)

Thoroughly enjoyed making this one, which I will give filled with choccies for Easter, and can see myself making a few more before the weekend!

Thanks for stopping by

Debs x

Monday, 25 March 2013

It's so cold!


 Finding it hard to work in my craft room at the moment as I have to wear so many layers to keep warm! Still, it's an ideal time to make Christmas cards lol!!

This one came about from trying to be good and use up snippets - the background is made of 1" squares punched from leftovers, and layered on the background card as a patchwork, with faux stitching to add to the effect.  The topper is an upcycled Christmas card (I save them all!) cut with a Spellbinders die, and backed with another snippet to match.  The tiny gingham bow kind of sets off the homespun theme I was going for - but was a **** to tie using such small leftover piece of ribbon - didn't have any more of this one so had to make it work :-)

Any my upcycled topper has 3 geese on, so fits with this week's Crafty Hazelnuts theme which is '3 of anything!' - so this one is entered in the following challenges:

Pixies Snippets Playground
Crafty Hazelnuts Christmas Challenge
Sarn's Rudolph Day challenge

And I wanted to say thanks to Shaz in Oz for her advice on how to add watermarks to your photos - super helpful advice, and pointed me in the right direction :-)

Happy crafting

Debs xx


Wednesday, 20 March 2013

The importance of photographs!

Excited tonight as I'm off to the NEC tomorrow with a friend - I won tickets on Ali Wade's blog - thanks Ali!! Haven't been as a visitor for a couple of years, and wasn't going to go this week as I went to Farnborough a few weeks ago. But having won the tickets it would be rude not to!!

Many of you know that I design for Making Cards magazine, and I wanted to upload photos of my Tea Bag folding projects that are in this months edition. then I realised I forgot to take any!! So here are pics of a couple of the mag pages instead :-)

Must remember the importance of photographing the projects when I'm in that frantic rush to submit them!

Maybe I'll bump into some of you tomorrow at the NEC - happy shopping :-)

Debs x

WOYWW and beer!

Hi fellow world travellers, hope you're enjoying your hop around the world. If you're not sure what's going on pop over to Julia's, where she hosts a weekly snoop into the crafty desks across the planet :-)


This was my desk yesterday afternoon, and nothing has changed since then. The beer in my post title refers to the Guinness cans you can see centre stage! I cut them up and die cut or emboss - great source of thin metal sheets, and Hubby is happy to help me build up my stash lol!! Have used them and loo roll inners on a magazine DT project with cogs and clocks - sorry, had to move that out of shot as not published yet!

Other things you can see are my trusty heat tool -heat embossed some of those cogs to look like rusty aged metal! Also a wedding card using the kanban Jasper Set, a spring card  for a blog challenge (see previous post) my fave fiskars scissors lower right of pic, and my Scotch photo glue (anyone know where I can buy more?? It's fab glue and I have a small stash but can;t find anywhere that sells it any more)

Ok, I'm off to blog hop and check put other creative desks

Happy woyww

Debs x


Tuesday, 19 March 2013

Happy Tuesday!

Had a lovely weekend in London at the O2 arena. Andy's Xmas pressie was a
Pair of tickets to a country music weekend festival - had a great time but Monday was a washout cos I was exhausted!

Bit more with it today and hit up the orange snippets folder in a big way! Just seemed like the right sort of colours for spring :-)


Used snippets of orange spots & stripes papers - no clue where they were from originally. And snippets of white card for my topper & die cut flourish & punched butterflies - have so many of these cut off pieces of white card, and they're perfect for these little die cuts!

The stamp is a Penny Black one that I love, coloured with Pro Markers - so entering this in the following challenges:
Penny black Saturday challenge
Pixies Playground Snippets
Pro Marker Challenge 
Forever Friends Challenge - flowers

Off to sort the washing :-)

Debs x

Wednesday, 13 March 2013

WOYWW and the kindness of crafty folk!

Hi everyone, I can't believe that it's Wednesday again (where on earth did that week go?!) and time for another whizz around the globe at Julia's Stamping Ground, to see what other crafters have on their desks.

You probably already know that I don't tidy my desk for your visits, but today is pretty dire! Dies that need the leftovers 'poking out', a part complete project on the left, planned for a future class, and my 'overflow' box on the far left - same place as last week, with much the same stuff in, and an experimental card fold on top!!


And this is what I've been working on with my Inkylicious dusters - the sand dunes image was inspired by one I saw at Farnborough, that was made using Adirondack inks, and I wanted to see if I could make something similar using my Distress Inks. Don't know about you, but I have a lot of Distress Inks, and I love them, (Julia asked about my colour chart on my desk last week - it was for my DI's!) and I can't really justify buying another set of inks (Adirondacks) if the DI's will do the same job - I was quite pleased with the results, and they will be the basis of a future class:-


My class yesterday was such fun, and one of my lovely ladies brought along a gift for me - a fab tartan scrapbooking bag! A friend of hers was throwing it out (!) and as she doesn't scrapbook, and already has a travelling craft bag, she decided to give it to me. Aren't crafters lovely people?


Anyway, Julia asks us to keep these posts relatively short (sorry Julia!) so I'd better stop waffling and start blog-hopping!

Happy WOYWW

Debs x


Tuesday, 12 March 2013

Tissue box covers

This is what I have planned for classes today and tomorrow. Tissue box covers, tailored to your own colour scheme & design!

The basic box is incredibly quick & easy to make from 2 sheets of A4 - I deconstructed a tissue box to make the template. And all the decoration is using Inkylicious Ink Dusters and stamps - plus a few punched shapes!

Thanks for stopping by

Debs x

Monday, 11 March 2013

Chocolate Birthday card

This card is for a relative who had a bit of a chocolate addiction! The card was inspired by the gorgeous chocolate spotty paper, but I only had a little left.

The snippets are all leftovers from the Hot Diggity Dog kit, so I am entering this in the Snippets challenge. I stamped the letters and cut them out, fixed them on the front of the card and covered them in Glossy Accents.

The little cupcake covers a stamping splodge :-( must take Di's advice and stamp first in case I make a boo boo!

Off to Pixies Playground to see if anyone's planning a snowball fight!

Happy crafting

Debs x

Thursday, 7 March 2013

Snippets

This snippets challenge is quite addictive! Only problem is I have tons of snippets - years worth all sorted into folders by colour - plus folders for b&w and mirror card - cant believe how much I've accumulated!

Anyhoo....this card uses snippets of pink & green Core-dinations card - like the linen Texture finish on this so don't always emboss/sand it to show the core. The topper & sentiment are from the Hot Diggity Dog range - made me laugh! Pet owners will relate :-) Entered in the Snippets Challenge.

Scheduling this one again, and will catch up with Pixies Playground chums later :-)

Wednesday, 6 March 2013

WOYWW - organised chaos

My desk looks a bit chaotic today - working on several projects and bits of all scattered everywhere!


You can see my stamping scratch pad centre stage (old flipchart pads of which I have tons!!). I use this as a stamping base, and to scribble notes - currently planning next weeks class!!  and seems like lots of people in craft land are having a bit of a spring clean/storage sort out - I have posted several storage solutions this week, and I'm still sorting - and I've noticed a definite trend in that direction among crafty blogs!

And this is my desk 10 seconds after I took this pic! No wonder I don't get much done lol!! Barney demanding attention trumps any project - he has the loudest miaow ever!!


Scheduled this as I'm not around today. Will visit your lovely worth desks later via Julia's weekly global desk hop

Happy crafting!

Debs x


Snippets

Had some leftover bright orange textured card that I can't for the life of me remember what it was originally used for! But.....was perfect contrast for these papers and toppers from the Hot Diggity Dog range - love the colours in this pack - all candy & chocolate shades!

Scheduled this post as I can't come & play at the moment - will visit the playground at Pixies later :-)

Entered for Pixies Snippets challenge

Thanks for stopping by

Debs x

Monday, 4 March 2013

Farnborough Make it & Stickles Storage

Had a lovely day out in Friday with a few ladies from my craft class. We went to the Make It craft show at Farnborough. I bought lots of lovely crafty stash, but I am now going on a self-imposed buying ban! This is what I bought.......


Some fab stamps, paper, scrapbooking goodies & my bargain of the day - huge 23metre reels of ribbon at £1.20 each!!

And here's a pic of some of us having lunch & showing off our purchases (sorry to the people who I managed to not get in the pic!!)


So today I've been working on DT projects that I can't show yet, being good & doing housework, and having a bit of a craft room sort out.

I'm always looking for new ideas to maximise space & re-purpose boxes etc for storage. This idea came about because my Stickles are thrown in a box & I have to rummage for the right colour, plus they're not quite ready to use as they're not stored nozzle down.

I couldn't face spending £18-20 on a purpose made carousel, and it's not really practical as I need to be able to transport then to classes - so I took one of my many saved boxes, and a length of foam insulation we had in the garage..


I cut the foam into 1.5" lengths and fixed to base of box. Hey presto! Nozzle down storage for 18 Stickles at a cost of £0 :-)


This has turned into a very long post - sorry peeps! Off to cook the dinner now.

Happy crafting!

Debs x


Thursday, 28 February 2013

Scrapbook Craft Storage

I am always on the lookout for boxes that I can 're-purpose' in my craft room. Unfortunately very few are capable of holding 12x12 scrapbook papers, and my papers have all been stored away in a Really Useful hanging file box specifically sized for 12x12. The problem is they're out of sight so don't get used so much. And the box tends to get used as a spare table too!

So this week I bit the bullet cos I found a super deal where you get a K&Co scrapbook, plus 36 K&Co papers, plus grand adhesions & stickers, all in a sturdy 12x12 paper storage box complete with dividers - for £15! I bought two :-)

They were delivered in these really sturdy cardboard boxes into which they fitted perfectly - hmmmmmmm

So, I used one of the 'proper' storage files as a template, drew round it into the cardboard and started cutting.


Hey presto! 2 additional 12x12 storage boxes for nowt :-)

Then I had to make them look pretty, and here they are on the shelf above the 'proper' ones - double the storage, looks good, and super sturdy - and I can see all my lovely papers at a glance - one happy crafter :-)


Off to Farnborough tomorrow with a few ladies from my craft class - my poor credit card!

Happy crafting

Debs x


Wednesday, 27 February 2013

WOYWW

Happy WOYWW fellow snoopers :-). This is my desk today.  It's grey & cold here & I'm a bit lacking in enthusiasm today. Will visit some of your desks to gain some inspiration!


My desk looks fairly tidy (for me!!) On the left you can see an A4 box crammed with stuff in need of sorting - I made a new rule that if box was full I had to sort it - so instead I piled on top& stacked underneath - lol!!

On my cutting mat (if you look closely it's warped at front where I forgot to use heat resistant mat when embossing - doh!) is a paper pad & some orange flowers ready for my next magazine project.

Centre back is a part-finished butterfly project inspired by something I saw on C&C. Not happy with it so will take a diff approach. Then there's my trusty Cuttlebug & the spotty caddy stuffed with the essentials.

On the right is my big yellow box where I have all my unmounted stamps catalogued, with a couple if new sets at the front of the box waiting to be added. I have 10 (gulp!) foolscap ring binders full of stamps sorted into categories - 3 folders of florals!!! Next project is to unmount my boxes of wooden stamps & integrate with the rest - I find I don't use my wooden stamps that much as they are piled in boxes, but I have some lovely ones, so they need sorting!

Right, enough waffle (sorry Julia!) off to desk hop! If you want to join in pop over to Julia's Stamping Ground.

Stop press!! The universe must have heard I was lacking enthusiasm, cos postie just delivered this little lot :-))

Thanks for stopping by

Debs x


Tuesday, 26 February 2013

Cold enough for Christmas!

It's still freezing here, so making Christmas cards seems totally right! Just had time to play before I have to nip off to the  torture chamber hairdresser ! I hate going to the hairdresser, so I tend to wait until I look like the Dulux dog before I give in and submit, and it's that time of the year again [sigh]

This card was inspired by Crafty hazelnuts challenge where the theme is '1 word is sufficient'

The Stamp is an old but much loved Personal impressions wooden stamp - think its called 'Hilltop Village'. Stamped & heat embossed with WOW black sparkle, then coloured with pro markers. Double mounted on white & black card.
The main image is Mounted on silver mirror card embossed with Cuttlebug Snowflakes folder then mounted on plain white card. The Peace star is from an old kit, mounted on black card to match the rest of the card

Also entered in:
Rudolph Day Challenge
Crafty Hazelnuts Christmas Extra

Thanks for stopping by!

Debs x

Monday, 25 February 2013

Crafty weekend

I had a lovely crafty weekend, spent loads of time in the craft room! Some of it was spent sorting and organising - I am not a tidy crafter lol ! Some of it was spent playing and making :-) It was bitterly coldhere so didn't feel too guilty about staying in lol !

I also did a lot of blog-hopping and found several challenges that looked like fun. This card was made for the pro Marker challenge, which was in a theme of Princes or Princesses & had to feature a crown! So I dressed up my Little Prince with his own crown :-)


Entered in the following challenges:
Pro Marker Challenge
Pixies Crafty Workshop Snippets as I used paper snippets from my bit box, and more leftover flowers
Milk Coffee Challenge - Make it Cute, cos it is!


And I made progress on another scrapbook layout. I am new to scrapbooking, and I am loving it! I get to use all my card making stash, but I get to keep it when it's finished :-)


This was supposed to be a short post, as I need to do some housework (aaaargh!)

Happy crafting

Debs x


Sunday, 24 February 2013

Love is in the air!


This is the cute card I made for Hubby for Valentines day.  I used a Penny black stamp from the Purrfect Day set, coloured with Pro Markers and die cut.


I used a die cut heart, cut around the paw and slid the heart under, so it looks as thought kitty is holding the heart :-)  the finished image was layered on die cuts of toning colours.  The 15cm square base card was stamped with hearts using Distress Inks in Tumbled Glass and peacock Feathers before fixing the die cut image in place and finishing with a few gems.


Happy Crafting

Debs x

Snippets

I have been visiting Pixies Crafty Workshop for ages, but never joined in with the Snippets (been a 'lurker' in the playground lol) - so here goes!


This was made using papers from a Pink Paislee 6x6 pad 'Spring Jubilee' - 1 full sheet mounted on black card, then the snippet I had left over with the bird on the corner, artfully torn to fit :-)

The white base card is overstamped with a tiny rose and butterfly in distress inks - Victorian Velvet and Spun Sugar.  The main image of the cottage is a Stampendous stamp 'Cottage Path' -  retired but I love it so much!  This stamped and coloured image was a sample from a recent Pro markers workshop, so I die cut it into a tag shape and mounted it on a snippet of black card (I have a whole box of black & white card snippets!)

The 'Home Sweet Home' stamp was a freebie as part of a collection in a recent cardmaking & Papercraft mag and is really cute! coloured with Pro Markers to match the papers.  the paper flowers are from a big pack I bought years ago, and the colours are quite bold, so they tend to sit in the bottom of the embellies box - a great chance to use them up!

I added pink gems to the centre of all the flowers, and the final 'snippet' was the little shrink plastic butterfly which was mistakenly stamped in a dark grey and when shrunk looked almost black - could be a bat I suppose (!) but actually looks more silver grey on the card than in the pic - was found languishing with the paper flowers in the embellies soup at the bottom of the box lol!

so, as a newbie to the playground, will there be a swing free for me, or will I end up being the one pushing the roundabout [sigh]

Happy crafting

Debs x


Friday, 22 February 2013

Finished sign!

So the sign is finally finished - here's a close up. I painted this with Pebeo acrylic paint, then stamped with Versamark using an old Elusive Images set, and embossed with WOW Pearl gold sparkle and Metallic Copper Sparkle - these are the most beautiful glitter embossing powders! I then added a few Kanban die cut butterflies I've been saving, they inspired the colour scheme of blue & copper :-)


A few people have mentioned that they have MDF projects so here's my tips from getting it wrong and then learning to do it right lol ! -

  • Sand the MDF before you start - pay particular attention to edges to get a smooth surface. Please make sure you sand in a well ventilated place, preferably outside, and wear a mask as MDF dust is toxic!
  • Seal the sanded MDF by painting with a 50/50 mix of PVA Glue & water - leave to dry
  • Paint with several thin coats of acrylic paint until you achieve the required depth of colour


And it's finally in pride of place on my door :-)


So I have a few chores to finish this morning, then I have the rest of the day to myself - crafty heaven :-)

Thanks for stopping by

Debs

Wednesday, 20 February 2013

Craft Room progressing!

So this was my desk yesterday You can see on my craft mat the MDF sign for my craft room, painted in blue acrylic.


I bought this at a show last year and, never having used MDF before, I  painted it without sealing it - big mistake! All the paint sank into the MDf and left me with a horrid mess, so I lost heart a bit and set it aside.

It's been sat on a shelf ever since just looking at me! I finally got around to researching how to paint MDF, sealed it with PVA and painted it again & voila!  I'll share the finished version in another post.

On the right is a scrapbook layout I've started, working on our hols from last year, and just above the layout some 12x12 I've set aside for future pages.

At the back is my trusty Cuttlebug and on the left my digital radio - I'm always singing along when crafting :-)


At the back on the right is a card I made with one of the lovely Tina Wenke stamps, of a hedgehog reading - I make tons of cards, and when they're finished they tend to get stored away in boxes, so I had the idea of displaying my favourite of the moment somewhere I could see it, so I get to enjoy them too!

If you're wondering why I'm telling you what's littering my desk, pop along to Julias blog, where she hosts a fab peek at desks around the world.

thanks for stopping by

Debs x

Wednesday, 6 February 2013

WOYWW & can anything be a desk?

So this week it's been pretty cold in my craft room, and to be sociable (stay warm :-)) I've reverted to crafting on my lap in front of the telly!

Now this creates it's own problems, but has definite advantages.......
On the plus side, warm, cosy in front of tv, on the downside....
My craft room is upstairs, and I'm up & down like the proverbial yoyo cos I always need just one more thing from my stash. And working on 12x12 is a challenge on a tea tray lol :-) plus the ginger furball keeps trying to sit on my lap - any time I'm in the armchair I'm fair game!


So, this is my 'desk' and the floor area around the footstool, you can see a bit of xmas paper peeking out & snowflake peel off's - I was having fun making Christmas cards lol!!- time to check out other desks over at Julia's - why not join in the blog-hop?

Happy crafting!

Debs x


Tuesday, 5 February 2013

Creative mojo missing!

Had a bit of a loss of the creative juices recently, so decided to throw myself in the deep end and made my first ever scrapbook page!

Have to say I'm rather chuffed with the result :-). There's tons of stuff on line to help you with scrapbooking, and I have a friend in the States who can always point me in the right direction (thanks Donna!!)

Happy crafting!

Debs x